
Showing posts with label sony ericsson. Show all posts

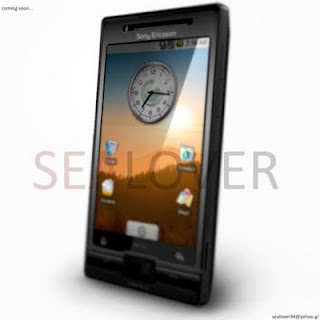
Sony Ericsson A8i


  • Introducing the first handset to support the TD-SCDMA network – the Sony Ericsson A8i
  • The Sony Ericsson A8i was developed in collaboration with China Mobile specifically for the Chinese market and runs on the operator’s OMS 2.0 smart phone platform

Beijing, China – August 31 2010 – Sony Ericsson today announces that it is strengthening its portfolio in China by launching the first smartphone to support China Mobile’s TD-SCDMA network – the Sony Ericsson A8i.

The Sony Ericsson A8i delivers high performance in a stylish form factor. The phone features a 3.5-inch (9 cm) touch screen and incorporates the human curvature design concept that is now consistent across the Sony Ericsson portfolio. The phone benefits comprehensive range of signature applications including TrackID which is linked directly with China Mobile’s entertainment download service – giving customers in China access to a wide range of local music.

Bert Nordberg, President & CEO, Sony Ericsson said, “China is a hugely important market for Sony Ericsson and we are committed to maintaining our strong position and driving growth by continually introducing new and exciting products into this market. Today cements that commitment and we are honored to introduce the Sony Ericsson A8i to users across China – enhancing to our already award winning* product line up in the region.”

“The Sony Ericsson A8i underpins our commitment to delivering the most entertaining smart phones. By combining the best communication and entertainment experiences on an open platform we are giving our customers the best possible consumer experience.”

Huidi Li, Assistant President, China Mobile said, “Demand for Smartphone is on the rise, and our customer’s are continually asking us to provide them with innovative, feature-rich products. Working closely with a partner such as Sony Ericsson, allows us to not only meet that need, but go one step further and deliver product and services that enhance overall user experience. The Sony Ericsson A8i is testament to the combined expertise of both companies and the first of its kind to support our TD-SCDMA network. We are proud to be adding this new product into our product portfolio.”

Sony Ericsson A8i at a glance:

  • High-speed, easy-to-use OMS 2.0 smartphne platform which is fully supported by China Mobile’s entertainment services and applications
  • Combines a 3.5” touch widescreen with CMMB mobile TV functionality and delivers amazing high-definition visual effects
  • Support both TD-SCDMA 3G networks and WLAN connections
  • Stylish design featuring the human curvature design concept
  • Features Sony Ericsson signature entertainment applications such as TrackID, linked directly with China Mobile’s music download service

Legal

© Sony Ericsson Mobile Communications AB, 2010

The Liquid Identity logo, Xperia, PlayNow and TrackID are trademarks or registered trademarks of Sony Ericsson Mobile Communications AB. Sony is a trademark or registered trademark of Sony Corporation. Ericsson is the trademark or registered trademark of Telefonaktiebolaget LM Ericsson. Additional information regarding trademarks may be located on our website at: www.sonyericsson.com/cws/common/legal/disclaimer.

Other product and company names mentioned herein may be the trademarks of their respective owners. Any rights not expressly granted herein are reserved. All terms are subject to change without prior notice.

Sony Ericsson Mobile Communications AB, SE-221 88 Lund, Sweden.

*Awards received in China include:

  • 2010, XPERIA™ X10i awarded the Best Worthy Expected 3G Flagship Smartphone in China Market by People.com.cn
  • 2009, W595c awarded Best Music Phone of 2009 and Sony Ericsson as Most Fashionable Phone Brand by Southern Weekly Magazine

Sony Ericsson is a 50:50 joint venture by Sony and Ericsson established in October 2001, with global corporate functions located in London and operations in all major markets. Sony Ericsson vision is to become the industry leader in Communication Entertainment; where new styles of communicating through the internet and social media, become entertainment. Sony Ericsson offers exciting consumer experiences through phones, accessories, content and applications. For more information please visit, www.sonyericsson.com.

Sony Ericsson A8i:

Camera

  • 5 megapixel camera
  • 4x digital zoom
  • Auto focus
  • Geo tagging
  • Photo flash
  • Photo light
  • Touch focus
  • Screen

  • 3.5 inches
  • 854x480 pixels
  • 262,144 colour TFT

Accessories

  • In-Box:
  • Sony Ericsson A8i
  • Battery
  • stereo portable handsfree
  • Charger
  • User documentation
Tell a Friend
Bookmark and Share

Sony Ericsson Zylo

Sony Ericsson Zylo

A small and sexy music slider – that’s what the Zylo is. Nothing more, nothing less. Sony Ericsson are probably hoping to start bringing up the next generation of loyal users. You know, give a kid a walkman and they will be coming back for more. The Zylo has the catchy beat and the good looks – and it’s got the social bug. Music and social networking are perhaps top of the young user’s list of needs and the Zylo meets them at a canter.

Sony Ericsson Zylo Sony Ericsson Zylo
Sony Ericsson Zylo official photos

But besides that, Zylo is a phone for the brokenhearted. A thing to help you remember. And we need to give it to Walkman phones – there is much to recall fondly. Whether Sony Ericsson are about to breathe new life into the W-brand or just shaking the dust off an old prototype that never got into production, the Zylo deserves credit for keeping the Walkman spirit alive.

Key features

  • Large 2.6" 16M-color TFT screen, 240 x 320 pixels, scratch-resistant surface
  • Quad-band GSM support
  • Dual-band 3G with 7.2Mbps HSDPA, 2Mbps HSUPA
  • 3 megapixel fixed-focus camera; VGA@24fps video recording
  • FM radio with RDS
  • Stereo Bluetooth 2.1
  • microSD card slot, 260 MB internal memory
  • Environment-friendly package
  • Social networking integration, widget-enhanced interface
  • NetFront v3.5 web browser with full Flash support
  • Very good audio output quality
  • Accelerometer sensor for UI auto-rotate
  • Smart dialing

Main disadvantages

  • No 3.5mm audio jack
  • No standard USB port
  • No bundled data cable or memory card
  • No camera lens cover
  • No document viewer

The Sony Ericsson Zylo is a cheap but stylish slider with a Walkman badge. It comes with fast HSPA support, but this is all the high-end connectivity you could expect. There are no premium features such as Wi-Fi and GPS. What puts an upsetting question mark on the whole package is the absence of a 3.5mm audio jack. It’s a cheap phone alright, and we know better than expect a proper audio plug in a Walkman. Doesn’t make sense but that’s how it is. Out of all W-line phones, there’re only two exceptions: the premium W995 and the dirty-cheap Spiro.

The latest feature phones by Sony Ericsson are keen to treat users to great social networking integration. The Zylo is no exception here. It gives you all the social stuff right on the homescreen with a solid widget set running live updates.

Tell a Friend
Bookmark and Share

sony ericsson XPERIA : Internet sharing - modem connection. - play music - Multimedia - Photo camera -


Internet sharing
Internet sharing connects a computer to the Internet by using
your phone data connection, such as GPRS and EDGE. Your
phone then functions as a modem. You can connect your phone
to a computer using a USB cable or by using Bluetooth™.
Before using Internet sharing, disconnect from Windows Mobile
Device Center or ActiveSync on the computer. Also make sure
your phone has a SIM card installed and a GPRS or phone dialup
modem connection.
Using your phone as a USB modem
To use your phone as a USB modem you need the USB cable.
Before you can use your phone as a USB modem you need to set
up Windows Mobile Device Center or Microsoft ActiveSync
version 4.5 or later on the computer.
To set up your phone as a USB modem
1 Select Start > Programs > Internet Sharing.
2 In the PC Connection list, select USB.
3 In the Network Connection list, select the name of the
connection that your phone uses to connect to Internet.
4 Plug in the USB cable between your phone and the computer.
5 Tap Connect.
Using your phone as a Bluetooth™ modem
You can connect your phone to a computer using Bluetooth™
and use the phone as a modem for the computer. For a computer
to use the Internet connection of your phone, you must activate
Internet Sharing in your phone, then set up a Bluetooth Personal
Area Network (PAN) between the computer and your phone.
If the computer does not have built-in Bluetooth capability, you
need to connect a Bluetooth adapter or dongle to your computer.
To activate Internet Sharing and set up a PAN
1 Turn on Bluetooth™ functionality in your phone and set it to
visible mode.
2 Initiate a Bluetooth partnership from your phone. For more
information, see To create a Bluetooth™ partnership.
3 Tap > Programs > Internet Sharing.
4 Select Bluetooth PAN as the PC Connection.
5 From the Network Connection list, select the name of the
connection that your phone uses to connect to the Internet.
6 Tap Connect.
7 In the computer, set up a Bluetooth Personal Area Network
(PAN) with your phone.
For Windows Vista:
1 Click Start > Control Panel > Network and Internet >
Network and Sharing Center.
2 Click Manage network connections and then under
Personal Area Network, double-click Bluetooth Network
Connection.
3 In the Bluetooth Personal Area Network Devices dialog
box, select your phone, then click Connect.
For Windows XP SP2:
1 Click Start > Settings >Control Panel > Network
Connections.
2 Find and click Bluetooth Network Connection in the list.
3 Under Network Tasks, click View Bluetooth network
devices.
4 In the Bluetooth Personal Area Network Devices dialog
box, select your phone, then click Connect.
8 On the Internet Sharing screen in your phone, check Status
to verify that the computer has been successfully connected
to the Internet using your phone as a Bluetooth modem.
To end the Internet connection
• Tap Disconnect on the Internet sharing screen.
Camera
You can take photos and record video clips with audio using the
camera in the phone. You will find saved photos and video clips
in the Media Xperience panel under Pictures and Videos.
Using the camera
1 Zoom in or out
2 View photos and video clips
3 Video mode
4 Photo mode
5 Activate the camera/Take photos/Record video clips
To activate the camera
• Press the camera button .
Do not record with a strong light source in the background. Use
a support or the self-timer to avoid a blurred picture.
To take a photo
1 Activate the camera and tap .
2 Press halfway down to use auto focus.
3 When the dot and focus frame are green, press fully down to
take the photo.
To use zoom
• Press the volume key up or down.
Zoom is only available when taking photos and with picture sizes
smaller than 3MP.
To record a video clip
1 Activate the camera and tap .
2 To use auto focus, press halfway down until the dot
and focus frame are green.
3 To start recording, press fully down.
4 To stop recording, press and hold down .
To send a photo or a video clip
1 Activate the camera and tap .
2 Tap .
3 Select if you want to send your item by E-mail or Picture
message.
To adjust brightness
• When you use the camera or video recorder, press the
navigation key left or right to adjust brightness.
To view photos and videos
1 Activate the camera and tap .
2 Scroll to the item using or .
3 To view a video clip, tap .
To delete a photo or a video clip
1 When you have taken a photo or recorded a video clip, tap
.
2 Tap .
To change settings
1 Activate the camera and tap or .
2 Tap and tap a button in the toolbar.
To view information about settings
1 Activate the camera and tap or .
2 Tap and then .
3 Tap a setting and then tap .
4 Tap to return.
To exit the camera
• Tap until you exit the camera.
The camera closes automatically if you do not use it for two
minutes.
Photo and video storage
You can save your photos and video clips either in the phone or
on the memory card.
To set storage location
1 Activate the camera, tap or .
2 Tap and then .
3 Tap .
4 Tap Save To and select an option.
To view files in File Explorer
1 Tap > Programs > File Explorer.
2 Select phone memory or memory card and then tap My
Pictures or My Videos folder.
More camera features
With touch focus you can set the desired focus location in the
viewfinder by tapping the screen before taking the photo.
To set touch focus
1 Activate the camera and tap .
2 Tap and then tap the Focus button in the toolbar.
3 Tap .
4 Tap to return to the viewfinder.
5 Tap the screen to set focus. To reset focus, double-tap the
screen.
6 Take the photo.
To turn on the light
1 Activate the camera and tap or .
2 Tap and then tap the Light button in the toolbar.
3 Tap .
4 Tap to return to the viewfinder.
Camera viewfinder icons
In the camera viewfinder, icons show the current setting.
Photo camera viewfinder
The top bar displays:
• Remaining number of photos you can take
• Picture size (resolution)
• Where photos are saved (phone memory or memory card)
The bottom bar displays:
• Shoot mode
• Scenes
• Focus
• White balance
• Light
• Self-timer(2 or 10 seconds)
Video camera viewfinder
The top bar displays:
• Video recording sound on/off
• Where clips are saved (phone memory or memory card)
• Shoot mode
• Recording status
• Time remaining (when not recording) or recorded time (when
recording)
The bottom bar displays:
• Shoot mode
• Scenes
• Focus
• White balance
• Light
• Self-timer (2 or 10 seconds)
Overview of camera settings
To go to settings
1 Activate the camera and tap or .
2 Tap to view a menu for the most common settings.
Photo camera
Icon Description
Scenes. Predefined settings for common photo
situations, includes Auto, Portrait, Landscape,
Twilight, Sports and Document
Focus. Predefined focus settings, includes
Touch, Auto, Macro and Infinite
Camera Light off or on
Shoot mode. Take one photo at a time using
Normal, or take a sequence of photos using
Multi-shot
Multimedia
You can open the Media Xperience panel to browse and use
media files such as pictures, music and video. Media files in your
My documents folder in the phone and on the memory card are
listed in the Media Xperience panel.
Pictures
You can use Pictures in the Media Xperience panel to view your
photos and pictures. The pictures can be captured with the
phone camera, received from other devices or moved to your
phone using the file manager, and stored in My Pictures in File
Explorer.
The pictures are sorted into three categories:
• Latest photos – Recently captured or received pictures.
• Camera album – Photos stored in My Pictures\Camera or its
sub folders. The photos are shown in albums in chronological
order.
• Pictures – Pictures stored in the My Pictures folder.
Some menu options become available when a picture is
highlighted.
To view a picture
1 In the Media Xperience panel, tap Pictures.
2 Tap a category to view its content.
3 Tap a picture to open it.
To delete a picture
1 In the Media Xperience panel, tap Pictures.
2 Tap a category and highlight a picture.
3 Tap Menu > Delete picture.
The picture will be permanently deleted from the memory, not just
from the viewer.
To show information about a picture
1 In the Media Xperience panel, tap Pictures.
2 Tap a category and highlight a picture.
3 Tap Menu > Information.
Title, creation date and size is shown.
Picture viewer toolbar
The toolbar is available when a picture is opened. You can tap
the picture to view the toolbar. You can tap again to hide it.
Icon Function
Display the picture title, creation date and size
Zoom in. Use the stylus to pan the picture
Rotate. Select and then tap and hold the picture and
rotate it. When you release the photo, it snaps to the
nearest 90 degree angle
Back to the previous menu
Go to the previous picture
Start a slideshow with the pictures in the current folder
To delete a photo from the photo viewer toolbar
1 In the Media Xperience panel tap Pictures > Camera album.
2 Tap an album.
3 Tap a photo to open it.
4 Tap to delete the photo.
To view a slideshow
1 In the Media Xperience panel tap Pictures > Camera album.
2 Tap an album and then a photo.
3 Tap to start the slideshow.
Music
To play music
1 In the Media Xperience panel, tap Music.
2 Browse for a track by Artists, Albums, Tracks or Playlists.
3 Tap a track to play it.
When you play WMA files, Windows Media Player is used
automatically.
To stop playing music
• In the music player, tap .
To fast forward or rewind
• In the music player, tap or .
To move between tracks
• In the music player, tap or .
To change the volume
• Press the volume key up or down.
To use the music player in the background
1 When listening to music, tap .
2 Select an application.
3 Press to return to the music player.
Playlists
You can create playlists to organize your music. Tracks can be
added to more than one playlist. Deleting a playlist, or a track
from a playlist, does not delete the track from the memory, just
the reference to the track.
To create a playlist
1 In the Media Xperience panel, tap Music > Playlists > Create
new playlist.
2 Enter a name and tap Ok.
To add a track to a playlist
1 In the Media Xperience panel, scroll to a track.
2 Tap Menu > Add track to playlist.
3 Tap a playlist.
To add an album to a playlist
1 In the Media Xperience panel, scroll to an album.
2 Tap Menu > Add album to playlist.
3 Tap a playlist.
To add an artist to a playlist
1 In the Media Xperience panel, scroll to an artist.
2 Tap Menu > Add artist to playlist.
3 Tap a playlist.
To remove tracks from a playlist
1 In the Media Xperience panel, tap Music > Playlists.
2 Tap on a playlist.
3 Scroll to a track.
4 Tap Menu > Remove from list.
Stereo portable handsfree
To use the handsfree
• Connect the portable handsfree. Music stops when you
receive a call and resumes when the call has ended.
Video
To play a video
1 In the Media Xperience panel tap Videos.
2 Tap Videos and scroll to a video.
3 Tap a clip to play it.
When you play WMV or ASF files, Windows Media Player is used
automatically.
Video player controls
Tap the screen to pause the video and access the following
controls:
1 Timeline marker. Tap the timeline to jump to any part of the
video clip
2 Elapsed time
3 Close the video player
4 Decrease volume
5 Mute the sound
6 Rewind
7 Resume playback
8 Fast forward
9 Increase volume
10 Change video size between original size and fullscreen
11 Total time
Streaming media
Streaming Media lets you stream live broadcasts or on-demand
media content from the Web. The media is sent in a continuous
stream to your phone and is played as it arrives, along with the
audio.
When you open links to streaming media content, for example,
YouTube™, in Opera or Internet Explorer, the Streaming Media
application automatically opens and starts playing the content.
The Streaming Media program allows you to play 3GP and
MPEG-4 files. It also supports playback of SDP (Session
Description Protocol) files.
To access streaming content via a browser
1 Tap Start > Internet Explorer or Start > Opera Browser
2 In the address bar, enter the URL address of the Web page
that contains the RTSP link to the desired *.3gp, *.mp4, or
*.sdp file.
3 On the Web page, tap the RTSP link.
4 Streaming Media automatically opens and starts playing the
file. During playback, use the button controls to play/pause,
zoom in or out, adjust the sound volume, and more.
To stream media files directly in the Streaming Media Player
Streaming Media only supports RTSP links when you stream *.
3gp and *.mp4 files directly on the program
Tell a Friend
Bookmark and Share

sony ericsson XPERIA : E-mail security - S/MIME encryption and digital signatures for Windows Mobile - Internet Explorer - Web feeds -

E-mail security
Digitally signing and encrypting your messages
Windows Mobile® in your phone protects your Outlook e-mails
through Secure/Multipurpose Internet Mail Extension (S/MIME),
which allows you to digitally sign and encrypt your messages.
Digitally signing a message applies your certificate with the
authorization key to the message. This proves to the recipient
that the message is from you and not from an imposter or a
hacker, and that the message has not been altered.
Encryption protects the privacy of your message by converting
it from plain, readable text into cipher (scrambled) text. Only the
recipient who has the authorization key can decipher the
message.
S/MIME encryption and digital signatures for Windows Mobile®
powered devices are available only with Exchange Server 2003
SP2 or a later version that supports S/MIME. If you are not using
one of these products, or have not yet synchronized, these
options are unavailable.
You can encrypt a message with or without a certificate. However,
to read an encrypted message, you need a valid certificate to
decrypt it.
To individually sign and encrypt a new message
1 Tap > Messaging > Outlook E-mail.
2 Tap Menu > New to create a new message.
3 Tap Menu > Message Options.
4 From the Security list, select whether to encrypt only, sign the
message only, or do both.
5 Tap ok.
To verify the digital signature on a signed message you
receive
1 Tap > Messaging > Outlook E-mail.
2 Open an Outlook e-mail message that has been digitally
signed.
3 At the top of the message, tap View Signature Status.
4 Tap Menu > Check Certificate.
5 To view the details of the certificate in the message, tap
Menu > View Certificate.
There can be several reasons why a digital signature is not valid.
For example, the sender’s certificate may have expired, it may
have been revoked by the certificate authority, or the server that
verifies the certificate is unavailable. Contact the sender to report
the problem.
To digitally sign and encrypt all messages
1 Tap > Programs > ActiveSync.
2 Tap Menu > Options.
3 Select the E-mail information type, and tap Settings. On the
E-mail Sync Options screen, tap Advanced.
4 Select one or both of the following options:
• Sign all outgoing e-mail messages – sign all your outgoing
e-mail messages so that recipients can be certain that the
messages were sent by you and have not been altered in
any way.
• Encrypt all outgoing e-mail messages – encrypt all your
outgoing e-mail messages so that the contents of your
messages are protected from being viewed by anyone
other than the intended recipients.
5 Tap Choose Certificate to select a certificate for signing or
encrypting outgoing e-mail messages.
You must obtain a valid certificate to sign and encrypt e-mail
messages successfully.
Setting permissions for an e-mail message
Another way of protecting your e-mail messages is to send
messages with restricted permissions using Information Rights
Management (IRM).
This works only with a Microsoft Outlook e-mail account and if
your company is using RMS Server SP1.
To set permissions for an e-mail message
1 Tap > Messaging > Outlook E-mail.
2 Tap Menu > New to create a new message.
3 Tap Menu > Message Options.
4 In the Permissions list, select one of the following:
• Unrestricted access – allow anyone to read the message.
• Do not forward – prevent the message from being
forwarded, printed, or copied.
5 Tap ok.
An IRM-protected message received on your phone can only be
replied to or forwarded if the message permits it.
Browsing the Web
Connecting to the Internet
You can connect to the Internet by using GPRS/HSPA or Wi-Fi.
Before connecting to the Internet by GPRS/HSPA you need
settings from your service provider. The settings are usually
saved on the SIM card during the start-up. If not, you should
contact your operator.
To start browsing
1 Tap > Internet Explorer.
2 Enter the Web address in the address field, and then tap .
Menu options
Tap and hold the screen to open a menu with useful options.
Menu at the bottom of the screen provides a lot of options for
Internet Explorer.
• Zoom out – View a larger part of the Web site.
• Home – Open your start page.
• Address bar – Open a new Web site. Enter a Web address in
the highlighted address bar.
• Favorites... – Open a list with bookmarks to your favorite web
sites.
• Add to favorites – Add a bookmark to an open Web site to
Favorites. You can also create sub folders to organize your
favorites.
• Forward – Return to the previously visited Web page that you
have left using the Back command.
• Refresh – Reload the current Web site.
• View – Open a sub menu and select how to view the Web
pages.
• Edit– Cut, copy or paste selected text.
• Tools – Open a sub menu where you can specify settings for
Internet Explorer.
View options
You can change the way that you view Web pages in Internet
Explorer to minimize scrolling and increase the page download
speed.
• Zoom level – Select a zoom level that suits the current Web
site.
• One column – Arranges the page into a column as wide as
the screen. This means you will rarely have to scroll
horizontally. This view usually downloads more quickly than
other views.
• Fit to screen – Maintains a layout similar to what you see on
a desktop computer. This makes items smaller and arranges
the page so you can see most of it without having to scroll
horizontally.
• Desktop – Keeps the same layout and size as a desktop
computer. This requires both horizontal and vertical scrolling.
• Full screen – This hides the menu bar and status bar and uses
the whole screen to display the Web page.
• Show pictures – Clear this option to let the Web page
download quicker.
Tools options
The Tools menu contains useful settings and options for Internet
explorer.
• History – View a list of the recently opened Web sites. Select
a site in the list to open it.
• Send Link – Use one of the listed methods to send a link to
the current Web site to another device.
• Properties – View information about the current Web site.
• Options – Specify settings for Internet Explorer.
• General tab – Set the Home page (start page) and the
default character set used by Internet explorer.
• Memory tab – Release memory space by setting for how
long Web links should be saved and by deleting saved Web
files.
• Security tab – The security settings help you to avoid
insecure Web pages. Cookies are files Web pages store on
your phone, that give you access to different services on a
Web page.
Managing Internet Explorer
Zooming
To zoom in and out on a Web page
1 On a Web page, tap Menu > View > Zoom level.
2 Select an option.
To pan a page, touch and hold the screen, then move your finger
or the stylus.
To change the Web page display
1 On a Web page, tap Menu > View.
2 Select an option.
Favorites
You can create and edit Favorites as quick links to your favorite
Web pages.
To add a favorite Web page
1 In Internet Explorer tap Menu > Add to favorites.
2 Enter a name, address and select the folder it will be saved
in, and then tap Add.
To go to a favorite Web page
1 In Internet Explorer tap Menu > Favorites....
2 Tap a favorite in the list.
Browsing previously visited Web pages
You can view Web pages you have previously visited.
To browse previously visited Web pages
1 In Internet Explorer tap Menu > Tools > History.
2 Tap a page title in the list.
Personalizing
To change home page
1 Browse to a Web page.
2 Tap Menu > Tools > Options > the General tab.
3 Tap Use current.
4 Tap ok.
To clear history
1 In Internet Explorer tap Menu > Tools > Options > the
Memory tab.
2 Tap Clear History.
3 Tap ok.
To clear cookies
1 In Internet Explorer tap Menu > Tools > Options > the
Security tab.
2 Tap Clear Cookies.
3 Tap ok.
Web feeds
You can subscribe to and download frequently updated content
such as news using Web feeds. Web feeds are accessed through
the Sony Ericsson panel.
2 Copy the Web address by tapping and holding the Web
address, and then tap Copy.
3 Go to the Sony Ericsson panel.
4 Tap Options > the Web Feeds tab.
5 Tap the next available position.
6 Paste the Web address into the address field at the top of the
screen by tapping and holding, and then tap Paste.
7 Select the number of blocks on the Sony Ericsson panel for
the Web feed. Each block contains two rows.
8 Tap ok.
To view Web feeds
1 In the Sony Ericsson panel tap the desired Web feed.
2 Choose the information you want to view, then tap Go to
Site.
To update Web feeds
• In the Sony Ericsson panel tap Update.
To schedule Web feeds update
1 In the Sony Ericsson panel tap Options > the General tab.
2 Select an option in Web Feeds Update Time.
3 Tap ok.
Frequent updates may be costly.
Calling when browsing
To make a call when browsing
• Press .
Getting connected
Bluetooth™ technology
Bluetooth™ technology enables wireless communication over
short distances. Devices with Bluetooth capabilities can
exchange information over a distance of about eight meters
without requiring a physical connection.
Bluetooth™ modes
Bluetooth™ functionality in your phone operates in three
different modes:
• On – Bluetooth functionality is turned on. Your phone can
detect other Bluetooth-enabled devices, but they cannot
detect your phone.
• Off – Bluetooth functionality is turned off. You can neither
send nor receive information over a Bluetooth link. Turn off
Bluetooth functionality when not in use to conserve battery
power, or in places where using a wireless device is
prohibited, such as on board an aircraft or in hospitals.
• Visible – Bluetooth functionality is turned on, and other
Bluetooth-enabled devices can detect your phone.
By default, Bluetooth functionality is turned off. To have it turned
on by default, turn it on, then immediately turn off your phone.
When you next time turn on your phone, Bluetooth functionality
is on.
To turn on Bluetooth™ functionality and make your phone
visible
1 Tap > Settings > the Connections tab > Bluetooth™ >
the Mode tab.
2 Mark the Turn on Bluetooth and Make this device visible to
other devices check boxes.
3 Tap ok.
Tell a Friend
Bookmark and Share

sony ericsson XPERIA : Company e-mails and appointments - Synchronizing your phone with an Exchange Server - Domain name - Scheduled synchronization

Company e-mails and appointments
Synchronizing your phone with an Exchange
Server
To keep up-to-date with your company e-mails and meeting
schedules when you are out of the office, you can connect your
phone to the Internet wirelessly and synchronize these
information with your company Exchange Server. You can also
access your company address book any time. Your company
must have a mail server that is running Microsoft® Exchange
Server with Exchange ActiveSync.
Setting up an Exchange Server connection
Before you can start to synchronize with, or access information
from, an Exchange Server, you need to set up an Exchange
Server connection in your phone. You may need the following
information from your network administrator:
• Exchange Server name (must be the Outlook Web Access
server name)
• Domain name
• User name and password that you use at work
To set up an Exchange Server connection
1 Tap > Messaging > Setup E-mail.
2 Enter your e-mail address and tap Next.
3 Unmark the Try to get e-mail settings automatically from the
Internet check box, then tap Next.
4 In the Your e-mail provider list, select Exchange server, then
tap Next.
5 Tap Next again.
6 Make sure the e-mail address is correct, then tap Next.
7 In the Server address box, enter the Exchange Server name,
then tap Next.
8 Enter your user name, password and domain, then tap Next.
9 Mark the check boxes for the types of information items that
you want to synchronize with the Exchange Server.
10 To change synchronization settings of an information type, for
example, E-mail, select the type of information, and tap
Settings.
11 Tap Finish. Your phone automatically starts synchronization.
If you synchronized emails with your PC before, open ActiveSync
in your phone and tap Menu > Add Server Source to set up an
Exchange Server connection. When you are prompted to select
information types for synchronization, you need to clear the Email
check box under the Windows PC item first before you can
select the E-mail check box under Exchange Server.
To change Exchange Server settings
1 Tap > Programs > ActiveSync.
2 Tap Menu > Configure Server.
Starting synchronization
Before you start synchronizing with the Exchange Server, make
sure your phone has been set up with a data connection to the
Internet so that you can synchronize wirelessly. Your phone
automatically starts synchronization when you finish setting up
an Exchange Server connection.
If you connect your phone to an office computer using a USB or
Bluetooth connection, you can use this connection to the PC to
access the network and download Outlook e-mails and other
information to your phone.
To start synchronization manually
1 Tap > Programs > ActiveSync.
2 Tap Sync.
Working with company e-mails
You can use your phone to get instant access to your company
e-mails and manage your messages easily. You can use many
tools, for example, Direct Push, Fetch Mail, Remote e-mail
search, and e-mail flags, to manage your e-mails on the phone.
Some messaging features depend on the Microsoft Exchange
Server version used in your company. Please check with your
network administrator for the availability of these features.
Automatic synchronization through Direct Push
You can use Direct Push technology (push e-mail feature) to
receive new e-mails in your phone as soon as they arrive in your
Inbox on the Exchange Server. This feature also works for items
such as contacts, calendar and tasks.
You need a GPRS connection in your phone to make Direct Push
work. You also need to perform a full synchronization between
your phone and the Exchange Server first before Direct Push can
be enabled.
When both the GPRS and Wi-Fi connections are turned on at the
same time, the Direct Push feature will always opt for Wi-Fi.
The Direct Push feature works for your phone only if your
company is using Microsoft Exchange Server 2003 Service Pack
2 (SP2) with Exchange ActiveSync or higher version.
To enable Direct Push using ActiveSync
1 Tap > Programs > ActiveSync.
2 Tap Menu > Schedule.
3 Select As items arrive in both Peak times and Off-peak
times boxes.
Frequent updates may be costly.
To enable Direct Push using Comm Manager
1 Tap > Programs > Comm Manager.
2 Select ON for Microsoft Direct Push .
Frequent updates may be costly.
Scheduled synchronization
If you do not want to use Direct Push, you can set a regular
schedule for synchronizing Outlook e-mail and information. Set
how often to synchronize during Peak times (which usually refer
to your working hours) when e-mail volume is high, as well as
Off-peak times when e-mail volume is low.
To set schedule for synchronization
1 Tap > Programs > ActiveSync.
2 Tap Menu > Schedule.
3 In the Peak times box and Off-peak times box, select time
interval as you need.
4 Tap ok.
To set the days and hours that make up your peak and off-peak
times, tap peak times in the sentence at the bottom of the screen.
Instant download through Fetch Mail
With the Fetch Mail feature, you can download an entire e-mail
immediately without performing a full Send/Receive action. This
limits the download to just the e-mail message that you want and
helps save data cost.
Fetch Mail works for your phone only if your company is using
Microsoft Exchange Server 2007 or higher.
To download through Fetch Mail instantly
1 Tap > Messaging > Outlook E-mail.
2 Tap an e-mail message to open it.
3 If the e-mail message is only partly downloaded, scroll to the
bottom of the message, then tap Get the rest of this
message.
4 Wait for the remainder of the message body to be
downloaded.
The initial download size limit for e-mail sync is changeable.
To change initial download size limit for e-mail
1 In ActiveSync in you phone, tap Menu > Options.
2 Tap E-Mail, then tap Settings.
3 In the Download size limit box, select an option.
4 Tap ok.
Searching for e-mails on the Exchange Server
You can access messages that are not available in your phone
by searching your Microsoft Exchange Server mailbox. The
search results are downloaded and displayed in a Search Results
folder.
Your company must be using Microsoft Exchange Server 2007 or
higher.
To search for Exchange Server e-mails
1 Tap > Messaging > Outlook E-mail.
2 Tap Menu > Tools > Search Server.
3 In the Look for text box, enter the search keyword.
4 Choose the date range of messages to search from.
5 From the Look in list, choose whether to search from your
inbox or outbox only or to search all folders.
6 Tap Search.
Message Flagging
Flags serve as a reminder to yourself to follow-up on important
issues or requests that are indicated in the messages. Flagging
messages, which has been a useful feature on desktop Outlook
E-mail, can also be done in Outlook Mobile in your phone. You
can flag received messages in your phone.
Flags are enabled only if e-mails are synchronized with Microsoft
Exchange Server 2007 or higher. Flags are disabled or hidden if
e-mails are synchronized with earlier versions of Microsoft
Exchange Server.
To flag or unflag a message
1 Tap > Messaging > Outlook E-mail.
2 Tap a message to open it.
3 Tap Menu > Follow Up and select one of the following
options:
• Set Flag – mark the message with a red flag to indicate it
needs follow up.
• Complete Flag – mark the message with a check mark to
indicate the issue or request in the e-mail is already
completed.
• Clear Flag – remove the flag to unmark the message.
E-mail message reminders are displayed in your phone if the
messages are flagged with reminders and synchronized from the
Exchange Server.
Out-of-office auto-reply
Microsoft® Office Outlook® Mobile allows you to retrieve and
change your out-of-office status. Just like desktop Outlook Email,
Outlook Mobile automatically sends an auto-reply message
when you are not available.
To send out-of-office auto-reply messages
1 Tap > Messaging > Outlook E-mail.
2 Tap Menu > Tools > Out of Office.
3 From the I am currently list, select Out of the Office.
4 Enter your auto-reply message then tap Done.
Viewing a document linked to an e-mail message
When you receive an e-mail that contains a link to a document
such as a PDF or Microsoft® Office document located on
SharePoint or an internal file server, you can view the document
on your phone.
You can view the document only if you have a Microsoft Outlook
account that synchronizes with Microsoft Exchange Server 2007
or later. Exchange Server must also be set up to allow access to
SharePoint document libraries or internal file servers.
To view a document linked to an e-mail message
1 Tap > Messaging.
2 Select an e-mail account, then open a message with a link to
a SharePoint document.
3 Tap the link to open and view the document.
Managing folders
In your phone, you can select the folders that you want to
synchronize with the Exchange Server. You can also create,
rename or delete folders easily.
To synchronize folders
1 Tap > Messaging > Outlook E-mail.
2 Tap Menu > Tools > Manage Folders.
3 Mark the check boxes for the folders that you want to
synchronize.
4 Tap ok.
You can quickly tap a folder twice to show its subfolders.
Managing meeting requests
When you schedule and send meeting requests from your phone,
you can invite attendees to your meeting and check their status
to know about their availability. When you receive a meeting
request, you can reply by accepting or declining the request. The
meeting request also clearly indicates whether or not there are
conflicting or adjacent meetings.
To reply to a meeting request
1 Tap > Messaging > Outlook E-mail.
2 Tap a meeting request e-mail to open it.
3 To check your availability during the time of the requested
meeting, tap View your calendar.
4 Tap Accept to reply and accept the meeting request, or tap
Menu > Decline if you cannot attend the meeting.
5 Choose whether or not to edit your response e-mail before
sending, then tap ok.
6 An accepted meeting request is automatically added as an
appointment in Calendar in your phone.
If the time of the meeting conflicts with your other appointments,
a Scheduling Conflict status appears on top of the e-mail.
To view the list of meeting participants
1 Tap > Calendar.
2 Tap an appointment item to open it, then tap Attendees.
When viewing a meeting that you have organized, the list shows
who has accepted or declined the meeting if your company is
using Microsoft Exchange Server 2007 or higher.
To view contact information of the attendees
1 In the list of meeting participants, tap one attendee's name.
2 If the attendee is not in your contacts list, tap Company
Directory to view the contact information.
Finding Contacts in the Company Directory
In addition to having contacts in your phone, you can access
contact information from your organization's Company
Directory. You can search using the following information as long
as that information is included in the Company Directory: First
name, Last name, E-mail name, Display name, E-mail address,
or Office location.
Access to the Company Directory is available only if your
organization is running Microsoft Exchange Server 2003 SP2 or
higher, and you have completed your first synchronization with
the Exchange Server.
To find contacts in the Company Directory
1 Synchronize with the Exchange Server if you have never done
so.
2 Do any of the following:
• Tap  > Contacts > Menu > Company Directory.
• In a new message, tap To:, or tap Menu > Add Recipient,
then tap Company Directory.
• In a new meeting request, tap Attendees, select Add
Required Attendee or Add Optional Attendee, then tap
Company Directory.
3 Enter part of or full contact name and tap Search.
4 In the search results list, tap a contact to select it.
You can save a contact from the Company Directory to your
phone by scrolling to the contact and then tapping Menu > Save
to Contacts.
Tell a Friend
Bookmark and Share

sony ericsson XPERIA : Synchronizing - install ActiveSync - To synchronize using a Bluetooth link - Scheduled synchronization - Use Windows Mobile De

Synchronizing
Synchronizing your data is a way to always have your information
up to date and carry it with you in your phone, whereever you go.
You can synchronize the following types of information between
a computer and your phone:
• Microsoft® Outlook® information, such as Outlook e-mail,
contacts, calendar, tasks and notes
• Media, such as photos, videos and music
• Favorites, which is Web page bookmarks under Mobile
Favorites
• Files, such as Microsoft® Office documents, pdf files and
more
Before you can synchronize
Before you can synchronize, you need to install and set up
synchronization software on your computer. If you are using
Windows XP you should first install ActiveSync, see To install
ActiveSync before you can set up synchronization. If you are
using Windows Vista you may not need to install any software
but you need to set up synchronization. For more information on
setting up synchronization, see To set up synchronization on
Windows XP and To set up synchronization on Windows Vista.
To install ActiveSync
1 Insert the software CD into the disc drive on the computer.
2 ActiveSync is available in English and several other
languages. Select the desired language and click Next.
3 Click Setup and Installation.
4 Select the ActiveSync check box and click Install.
5 Read the license terms and click Accept.
6 When installation is complete, click Done.
7 Finish the installation by clicking Close.
Ways to synchronize
After you have installed the synchronization software in a
computer, you can synchronize your phone with your computer
using one of the following methods:
• USB connection - When you connect the USB cable between
your phone and a computer, the synchronization process
starts automatically.
• Bluetooth connection - You must first set up a Bluetooth
partnership between your phone and the computer before
you can synchronize information between them. For more
information about setting up a Bluetooth partnership, see
Bluetooth™ partnership. For information about synchronizing
through Bluetooth, see To synchronize using a Bluetooth
link.
• Wireless connection - Synchronize with an Exchange Server
using ActiveSync or Windows Mobile Device Center.
Try to synchronize frequently in order to keep information up-todate
in both your phone and the computer.
Setting up synchronization
• If the computer uses Windows XP® or other compatible
Windows operating system, you should use Microsoft
ActiveSync® 4.5 or later. You can find Microsoft ActiveSync®
on the CD that comes with the phone.
• If the computer uses Windows Vista®, you should use
Windows® Mobile Device Center, which is part of Windows
Vista.
To set up synchronization on Windows XP
1 Install Microsoft ActiveSync® on the computer from the CD
that comes with the phone.
2 Connect the phone to the computer using the USB cable that
comes with the phone. The Synchronization Setup Wizard
automatically starts and guides you to create a
synchronization partnership.
3 Click Next on the computer.
4 To synchronize your phone with the computer, mark the
Synchronize directly with a server running Microsoft
Exchange check box and click Next.
5 Select the information types that you want to synchronize,
then click Next.
6 Click Finish.
To set up synchronization on Windows Vista
1 Connect the phone to the computer using the USB cable that
comes with the phone.
2 The Windows® Mobile Device Center automatically starts.
Click Set up your device.
3 Select the information types that you want to synchronize.
4 Type a name for the phone, and click Set Up.
Starting synchronization
To start synchronization from ActiveSync® on your
computer using a USB cable
• Connect the phone to the computer using the USB cable that
comes with the phone. ActiveSync® automatically opens and
the synchronization starts.
To start synchronization from the phone
1 Connect the phone to the computer using the USB cable that
comes with the phone.
2 Phone: Tap > Programs > ActiveSync.
3 Phone: Tap Sync.
To start synchronization from Windows® Mobile Device
Center on a computer
1 Connect the phone to the computer using the USB cable that
comes with the phone.
2 Computer: Click Start > All Programs > Windows Mobile
Device Center.
3 Computer: Click at the lower left part of the Windows®
Mobile Device Center window.
Synchronizing using a Bluetooth connection
You can connect and synchronize your phone with a computer
using a Bluetooth connection.
The computer must have a built-in Bluetooth functionality or else
you must use a Bluetooth adapter or dongle togehter with the
computer.
To synchronize using a Bluetooth link
1 Set up Windows® Mobile Device Center or ActiveSync on the
computer. See Help in the phone for instructions.
2 In your phone, tap > Programs > ActiveSync.
3 Make sure the Bluetooth function in both your phone and the
computer is turned on and set to visible. For more information,
see To turn on Bluetooth™ functionality and make your phone
visible.
4 Tap Menu > Connect via Bluetooth.
5 If this is the first time you connect to this computer using a
Bluetooth link, you must first complete the Bluetooth wizard
in your phone and set up a Bluetooth partnership between
your phone and the computer. For more information, see
Bluetooth™ partnership.
To conserve battery power, turn off the Bluetooth function when
not in use.
Scheduled synchronization
Scheduled synchronization allows you to set specific times for
when your phone should connect and synchronize with the
Exchange Server. This is an alternative to Direct Push, where all
changes and new items are immediately pushed from your phone
to a computer and from a computer to your phone.
With scheduled synchronization you can set a regular schedule
for synchronizing Outlook e-mails and other information. You can
set how often to synchronize during peak times (which usually
refer to your working hours) when e-mail volume is high, as well
as off-peak times when e-mail volume is low.
To set up scheduled synchronization
1 Tap > Programs > ActiveSync.
2 Tap Menu > Schedule.
3 Select a time interval in the Peak times box for how frequently
you want to receive e-mail.
4 Select a time interval in the Off-peak times box.
5 Mark the Send/receive when I click Send.
6 Tap Adjust peak times to fit your schedule to set the days
and hours that make up your peak and off-peak times.
To disable all scheduled synchronization, set the values in the
Peak times box and the Off-peak times box to Manually.
Changing which information is synchronized
You can change the information types and the amount of
information to synchronize for each type either on your phone or
a computer. Follow the steps below to change synchronization
settings on your phone.
Before changing synchronization settings on your phone it must
be disconnected from the computer.
To change which information is synchronized
1 Tap Start > Programs > ActiveSync.
2 Tap Menu > Options.
3 Select the check box for any items you want to synchronize.
4 To change synchronization settings for an information type,
select it and tap Settings. This allows you to set the download
size limit, specify the time period of information to download
and more.
Use Windows Mobile Device Center
In Windows Mobile Device Center you can do the following:
• Access synchronization settings to view and change them
• Tag and transfer photos from your phone to the Photo Gallery
on your Windows Vista PC
• Synchronize music and video files using Windows Media®
Player. For more information, see Windows Media® Player
Mobile
• View documents and other files in your phone
See Windows Mobile Device Center Help for more information.
To access synchronization settings using Windows Vista
1 Click Start > All programs > Windows Mobile Device
Center on your Windows Vista computer.
2 Click Mobile Device Settings.
To tag and transfer photos from your phone
1 Click Start > All Programs > Windows Mobile Device
Center on your Windows Vista computer.
2 Click Pictures, Music and Video > _new pictures/video clips
are available for import. A wizard will guide you through the
process.
To synchronize music and video files using Windows Media
Player
1 Click Start > All Programs > Windows Mobile Device
Center on your Windows Vista computer.
2 Click Pictures, Music and Video > Add media to your device
from Windows Media Player. For more information, see
Windows Media® Player Mobile.
To view documents and files in your phone
1 Click Start > All Programs > Windows Mobile Device
Center on your Windows Vista computer.
2 Click File Management > Browse the content of your
device.
Organizing PIM
Personal Information Management (PIM) includes handling of
contacts, calendar, tasks and more.
Contacts
Contacts is your address book and information storage for the
people and businesses you communicate with. There are three
types of contacts that you can create on your phone:
• Microsoft® Office Outlook® contacts. Contacts that are
stored on your phone, which can be created on your phone
or synchronized with your computer or the Exchange Server.
For each contact you can store phone numbers, e-mail
addresses, instant messaging (IM) names, company and
home addresses and information such as job title, birthday,
and a lot more. You can also add a picture and assign a ring
tone to an Outlook contact.
• SIM contacts. Contacts that are stored on the SIM card. Only
the name and a phone number can be stored for each entry.
• Windows Live™ contacts. Contacts that you communicate
with using Windows Live™ Messenger or MSN. Just like
Outlook contacts, you can also enter complete information
for a Windows Live contact. For more information, see
Windows Live Messenger.
You can also add Windows Live™ contacts after you have set up
Windows Live™ on your phone.
Managing contacts
Your phone gives you several ways to store and manage phone
numbers and other information about your contacts:
• Use Contacts to create and save contacts on your phone
memory or your SIM card.
• Use SIM Manager to store and manage SIM contacts.
To add an Outlook contact
1 Tap Start > Contacts.
2 Tap New, select Outlook Contact and enter the contact
information.
3 In the File as field, choose how you want the contact name
to appear in the contact list.
4 To add a photo of the contact, tap Select a picture..., then
select the picture file or tap Camera to take a photo of the
contact. This photo appears on the Phone screen when you
receive a call from the contact.
5 To assign a ring tone to the contact, tap the Ring tone field,
scroll through the list of tones, then select a desired tone.
6 Finish by tapping OK.
If someone who is not in your list of contacts calls you, you can
create a contact from Call History by tapping and holding a phone
number and then tapping Save to Contact from the shortcut
menu.
Tell a Friend
Bookmark and Share

sony ericsson XPERIA : Setting up your phone - Personalizing the Today Screen - To activate the SIM card lock - Encryption - Synchronizing with a com

Setting up your phone
Basic settings
Owner information

Having owner information displayed on the Today screen makes
it easier for someone to return your phone to you if it is lost.
To enter owner information
1 Tap >Settings > the Personal tab > Owner Information.
2 On the Identification tab, enter your personal information.
If you don’t see owner information on the Today screen, tap
> Settings > the Personal tab > Today. On the Items tab,
mark the Owner Info check box and select ok.
To display owner information when the phone is turned on
1 Tap >Settings > the Personal tab > Owner Information.
2 On the Options tab, mark the Identification information
check box.
3 If you want additional text displayed, tap the Notes tab and
enter the text, for example, Reward if found.
4 On the Options tab, mark the Notes check box then tap ok.
Time and date
To set time and date
• Tap > Settings > the System tab > Clock & Alarms > the
Time tab.
To set time and date for a different location
1 Tap > Settings > System tab > Clock & Alarms > Time
tab.
2 Tap Visiting.
3 Select the correct time zone and change the time or date.
Regional settings
The style in which numbers, currency, dates, and times are
displayed is specified in regional settings.
To change regional settings
1 Tap >Settings > the System tab > Regional Settings.
2 On the Region tab, select your region from the list.
3 To customize settings further, tap the appropriate tabs and
select the desired options.
Changing region does not change the Operating System
language of your phone.
The region you select determines which options will be available
on the other tabs.
Personalizing
Personalizing the Today Screen
The Today screen shows your upcoming appointments, active
tasks, and information about incoming messages. You can
customize what to display on the Today screen.
To customize the Today screen
1 Tap > Settings > the Personal tab > Today.
2 On the Appearance tab, select the desired theme for the
background of the Today screen.
3 On the Items tab, select the items you want to appear on the
Today screen.
To change the order of items displayed on the Today screen, tap
the item, and tap Move Up or Move Down.
To use a custom background image
1 Tap > Settings > the Personal tab > Today.
2 Mark the Use this picture as the background check box, and
tap Browse to view a list of your picture files.
3 Tap the file name of the picture you want to use.
4 Tap ok.
To set options for displaying appointments on the Today
screen
1 Tap > Settings > the Personal tab > Today.
2 Tap the Items tab.
3 Select Calendar and tap Options….
4 Do any of the following:
• Select Next appointment to show only the next
appointment in your schedule, or Upcoming
appointments to show multiple appointments.
• Unmark the Display all day events check box if you do not
want to display all-day events.
To set options for displaying tasks on the Today screen
1 Tap > Settings > the Personal tab > Today.
2 Tap the Items tab.
3 Select Tasks and tap Options….
4 Do any of the following:
• Under Display number of, mark check boxes for the type
of tasks you want to appear on the Today screen.
• In the Category list, select whether to display only tasks
assigned to a specific category or to display all tasks.
Customize the Start menu
You can choose which items appear in the Start menu.
To customize the Start menu
1 Tap > Settings > the Personal tab > Menus.
2 Mark the check boxes of the items you want to appear in the
Start menu. You can select up to seven items.
Customizing phone settings and services
You can customize phone settings, such as the ring type and ring
tone to be used for incoming calls, and the keypad tone to be
used when entering phone numbers. You can also set up your
phone to use phone services such as Call Waiting, Call
Forwarding and more.
To access phone settings and services
• Tap > Settings > the Personal tab > Phone.
Ringer settings
To change ring type and ring tone for an incoming call
1 Tap > Settings > the Personal tab > Sounds &
Notifications > the Notifications tab.
2 Select Ring type.
3 Select Ring tone.
Keyboard tone
You can change the tone you hear when entering a phone
number on the keyboard. If set to Long tones, the tone is heard
continuously for as long as the number on the keyboard is
pressed. Use this setting if you are having trouble accomplishing
tasks that rely on tones from your phone such as accessing
messages from an answering machine. If set to Short tones, the
tone is heard only for one or two seconds. If set to Off, no tone
is heard.
To set keyboard tone
1 Tap > Settings > the Personal tab > the Phone >
Phone tab.
2 In the Keypad list, tap the option you want.
Phone services
Your phone can directly link to the mobile phone network, and
allow you to access and change the settings of various phone
services.. Phone services may include Call Forwarding, Call
Waiting, Voicemail and more. You can contact your wireless
service provider to find out about the availability of phone
services for your phone.

To access and change settings of phone services
1 Tap > Settings > the Personal tab > Phone > the
Services tab.
2 Select the service you want to use, then tap Get Settings....
3 Choose your desired options, then tap ok.
Networks
You can view which mobile phone networks are available and
arrange them in the order that you want your phone to access
them. For example, if your first preferred network is unavailable,
your phone will try to access your second preferred network.
To view available networks
1 Tap > Settings > the Personal tab > Phone > the
Network tab.
2 Under Network selection, select Manual. The list of available
networks is then displayed.
To set preferred networks
1 Tap > Settings > the Personal tab > Phone > the
Network tab.
2 Tap Set Networks and follow the instructions on the screen
to arrange the networks according to your preference.
3 After arranging the networks in the preferred order, tap ok to
return to the Network tab.
4 In the Network selection list, select Automatic.
5 Tap ok.
Protecting the phone
You can protect the phone from unauthorized or accidental use
by activating locks.
To activate the SIM card lock
1 Tap > Settings > the Personal tab > Phone > the PIN/
PIN2 tab.
2 Mark the Require PIN when phone is used check box.
3 Tap ok.
Your PIN is supplied by your network operator.
To activate the phone lock
1 Tap > Settings > the Personal tab > Lock.
2 Mark the Prompt if device is unused for check box, and tap
a time.
3 Select Password type, confirm the password and tap ok.
To use the key lock
1 Press the power button to turn off the screen temporarily and
switch the phone to sleep mode.
2 To wake up the phone, press the power button. The phone is
also awakened by opening the keyboard, or by receiving a
call or a message.
Alternatively, you can lock the keys by pressing and holding
. To unlock the keys, tap Unlock.
IMEI number
Keep a copy of your IMEI (International Mobile Equipment
Identity) number in case your phone is stolen.
To view your IMEI number
1 Press .
2 Tap .
To encrypt data on your storage card
1 On the Today screen, tap > Settings > the System tab
> Encryption.
2 Mark the Encrypt files placed on a storage card check box.
• Encrypted files can be read only on the phone that encrypted
them.
• Encrypted files are opened just like other files, provided you
are using the phone that encrypted them. There is no separate
step for you to take to read these files.
If Encrypt files placed on storage cards is or was enabled before,
then backup all files from the storage card before using Clear
Storage, hard reset or updating the ROM system software.
Otherwise you will no longer be able to access the encrypted files
on the storage card. Use ActiveSync or Windows Mobile Device
Center to transfer files between your storage card and computer.
After the procedure, copy your files back to the storage card.
Other settings
Phone name
The phone name is used to identify your phone in the following
situations:
• Synchronizing with a computer
• Connecting to a network
• Restoring information from a backup
If you synchronize multiple phones with the same computer, each
phone must have a unique name.
To change the phone name
1 Tap > Settings > the System tab > About.
2 Tap the Device ID tab.
3 Enter a name.
The phone name must begin with a letter, consist of letters from
A to Z, numbers from 0 to 9, and cannot contain spaces. Use the
underscore character to separate words.
Display settings
To increase or decrease the size of text on the screen
1 Tap > Settings > the System tab > Screen > the Text
Size tab.
2 Move the slider to increase or decrease the text size.
Button settings
Your phone might come with programs already assigned to
hardware buttons. You can customize these buttons to open the
programs you use most, or to perform certain shortcuts.
To reassign programs or shortcuts to program buttons
1 Tap > Settings > the Personal tab > Buttons.
2 A list of buttons and their current assignments are displayed
on the Program Buttons tab.
3 Tap the button you want to reassign. To help you identify the
buttons, there are numbers and icons representing the
original function of the button.
4 In the Assign a program box, tap the program or shortcut you
want to assign.
5 Tap ok.
To reassign a program button for switching between
Portrait and Landscape modes
1 Tap > Settings > the Personal tab > Buttons.
2 On the Program Buttons tab, in the Select a button box, tap
the button you want to reassign, for example, Left key.
3 In the Assign a program box, select Rotate Screen.
4 Tap ok.
You can now use your left program button (hardware button) to
switch between Landscape and Portrait modes. Note that you
cannot use it to control corresponding software keys any more.
Word completion options
Word completion helps you enter text faster by suggesting words
as you enter letters using the hardware keyboard or input
methods. You can set the number of suggested words to display,
when to show the word list and more.
To set Word completion on
1 Tap > Settings > the Personal tab > Input > the Word
Completion tab.
2 Make sure the Suggest words when entering text check box
is marked.
3 By default, the suggested word list appears whenever you
enter a space. To make the word list appear after letters are
entered, select the number of letters that you want to be
entered before displaying the word list.
4 The suggested word list shows up to four words by default.
You can change the number of words to display in the
suggested list.
5 Make sure the Enable Auto Correct check box is marked if
you want mistyped words to be corrected automatically.
The word database learns and adds more words as you enter new
words during text entry. To delete the added words and reset the
database back to the default, tap Clear Stored Entries.
Alarms and notifications
To set an alarm
1 Tap > Settings > the System tab > Clock & Alarms >
the Alarms tab.
2 Tap and enter a name for the alarm.
3 Tap the day of the week for the alarm. You can select multiple
days by tapping each desired day.
4 Tap the time to open a clock and set the time for the alarm.
5 Tap the alarm icon to specify the type of alarm you want. You
can choose a flashing light, a single sound, a repeating sound,
or vibration.
6 If you choose to play a sound, tap the list next to the Play
sound check box and tap the sound you want.
To choose how to be notified about events or actions
1 Tap > Settings > the Personal tab > Sounds &
Notifications.
2 On the Sounds tab, choose how you want to be notified by
marking the appropriate check boxes.
3 On the Notifications tab, in Event, tap an event name and
choose how you want to be notified by marking the
appropriate check boxes. You can choose from several
options, such as a special sound, a message, or a flashing
light.
Tell a Friend
Bookmark and Share

w995 sony ericsson : Flight mode - Update Service - HSDPA - Locks - SIM card lock - Security - Change code - IMEI number - Troubleshooting - Master re

Flight mode
In Flight mode the network and radio
transceivers are turned off to prevent
disturbance to sensitive equipment.
When the flight mode menu is activated
you are asked to select a mode the next
time you turn on your phone:
• Normal mode – full functionality
• Flight mode – limited functionality
To activate the flight mode menu
• Select Menu > Settings > General >
Flight mode > Continue > Show at
startup.
To select flight mode
1 When the flight mode menu is
activated, turn off your phone.
2 Turn on your phone and select Flight
mode.
Update Service
You can update your phone with the
latest software using your phone or a
PC.
Updating using your phone is not possible
in all countries/regions.
To view the current software in the
phone
1 Select Menu > Settings > General >
Update service.
2 Select Software version.
Update Service using the phone
You can update your phone over the air
using your phone. You do not lose
personal or phone information.
Update Service using your phone
requires data access such as GPRS, 3G
or HSDPA.
To select settings for Update Service
• Select Menu > Settings > General >
Update service > Settings > Internet
settings.
To use Update Service using the
phone
1 Select Menu > Settings > General >
Update service.
2 Select Search for update and follow the
instructions that appear.
Update Service using a PC
You can update your phone using a
USB cable and an Internet-connected
PC.
Make sure all personal data in your phone
memory is backed up before you perform
an update using a PC. See Backing up
and restoring on page 43.
To use Update Service using a PC
• Go to
www.sonyericsson.com/updateservice.
Locks
SIM card lock
This lock only protects your
subscription. Your phone will work with
a new SIM card. If the lock is on, you
have to enter a PIN (Personal Identity
Number).
If you enter your PIN incorrectly three
times in a row, the SIM card is blocked
and you need to enter your PUK
(Personal Unblocking Key). Your PIN
and PUK are supplied by your network
operator.
To unblock the SIM card
1 When PIN blocked appears, enter your
PUK and select OK.
2 Enter a new four-to-eight-digit PIN and
select OK.
3 Re-enter the new PIN and select OK.
To edit the PIN
1 Select Menu > Settings > General >
Security > Locks > SIM protection >
Change PIN.
2 Enter your PIN and select OK.
3 Enter a new four-to-eight-digit PIN and
select OK.
4 Re-enter the new PIN and select OK.
If Codes do not match appears, you
entered the new PIN incorrectly. If Wrong
PIN appears, followed by Old PIN:, you
entered your old PIN incorrectly.
To use the SIM card lock
1 Select Menu > Settings > General >
Security > Locks > SIM protection >
Protection.
2 Select an option.
3 Enter your PIN and select OK.
Phone lock
You can stop unauthorised use of your
phone. Change the phone lock code
(0000) to any four-to-eight-digit
personal code.
It is important that you remember your
new code. If you forget it, you have to take
your phone to your local Sony Ericsson
retailer.
To use the phone lock
1 Select Menu > Settings > General >
Security > Locks > Phone protection >
Protection.
2 Select an option.
3 Enter the phone lock code and select
OK.
To unlock the phone
• Enter your code and select OK.
To change the phone lock code
1 Select Menu > Settings > General >
Security > Locks > Phone protection >
Change code.
2 Enter the old code and select OK.
3 Enter the new code and select OK.
4 Repeat the code and select OK.
Keypad lock
You can set this lock to avoid
accidental dialling. Incoming calls can
be answered without unlocking the
keypad.
Calls to the international emergency
number 112 can still be made.
To use the automatic keylock
1 Select Menu > Settings > General >
Security > Automatic keylock.
2 Select an option.
To unlock the keypad manually
• From standby press any key and select
Unlock > OK.
IMEI number
Keep a copy of your IMEI (International
Mobile Equipment Identity) number in
case your phone is stolen.
To view your IMEI number
• Press , , , , .
Troubleshooting
Some problems can be fixed using
Update Service. Using Update Service
on regular basis will optimize the
phone’s performance. See Update

Some problems will require you to call
your network operator.
For more support go to
www.sonyericsson.com/support.
Common questions
I have problems with memory
capacity or the phone is working
slowly
Restart your phone every day to free
memory or do a Master reset.
Master reset
If you select Reset settings, the
changes that you have made to
settings will be deleted.
If you select Reset all, your settings and
content, such as contacts, messages,
pictures, sounds and downloaded
games, will be deleted. You may also
lose content that was in the phone at
purchase.
Troubleshooting
To reset the phone
1 Select Menu > Settings > General >
Master reset.
2 Select an option.
3 Follow the instructions that appear.
I cannot charge the phone or battery
capacity is low
The charger is not properly connected
or the battery connection is poor.
Remove the battery and clean the
connectors.
The battery is worn out and needs to be
replaced. See Charging the battery on
page 7.
No battery icon appears when I start
charging the phone
It may take a few minutes before the
battery icon appears on the screen.
Some menu options appear in grey
A service is not activated. Contact your
network operator.
I cannot use Internet-based services
Your subscription does not include
data capability. Settings are missing or
incorrect.
You can download settings using the
setup wizard or by going to
www.sonyericsson.com/support.
To download settings
1 Select Menu > Settings > User help >
Settings download.
2 Follow the instructions that appear.
Contact your network operator or service
provider for more information.
I cannot send messages from my
phone
Most messages require a service
centre number to send them. The
number is supplied by your service
provider and is usually saved on the
SIM card. If the number to your service
centre is not saved on your SIM card,
you must enter the number yourself.
To send most picture messages, you
must set an MMS profile and the
address of your message server. If no
MMS profile or message server exists,
you can receive all the settings
automatically from your network
operator, download settings using the
setup wizard or at
www.sonyericsson.com/support.
Tell a Friend
Bookmark and Share

w995 sony ericsson : Synchronising -To turn on or off GPS manually - To set the personal profile - Microsoft Outlook - synchronisingusing an Internet

To turn on or off GPS manually
1 Select Menu > Location services >
Settings.
2 Select Enable GPS or Disable GPS.
Tracker
Tracker is a GPS-based sports
application which allows you to keep
track of your speed, distance, route
and energy consumption during
training. You can base the training on
how long time you want to train or on
what distance you want to cover. You
can also base it on a previous training
route which has GPS data.
Information provided by use of the
Tracker application is approximate.
Sony Ericsson makes no warranty of any
kind with respect to the accuracy of the
Tracker application. Any serious health
and fitness concerns should be referred
to a health care professional.
To start a training session
1 Select Menu > Location services >
Tracker > Start training.
2 Select a training type.
3 Scroll to an item, select Edit and enter
the data.
4 To save, select Done.
5 To start training, select Start.
To switch between training views
• During a training session, press or
to view information on training
duration, progress and live comparison
with a previous session.
To compare results during training
1 Select Menu > Location services >
Tracker > Start training.
2 Select Route based.
3 Scroll to Route:, select Edit and select
a route.
4 Scroll to Live compare and select Edit.
5 Scroll to the result you want to
compare with and select Compare.
6 Select Done and then Start.
A GPS location is required before results
can be compared. For more information,
see Using GPS on page 54.
To end a training session manually
• During a training session, select
Pause > End.
Results
The training result is shown after a
session is ended. You can view past
results anytime, and compare them if
they have GPS data.
To view a training result
1 Select Menu > Location services >
Tracker > Results.
2 Scroll to a month and select View.
3 Scroll to a date and select View.
4 Select a training result. If you have used
laps, press or to view result per lap.
To compare results
1 Select Menu> Location services >
Tracker > Results.
2 Scroll to a result and select Options >
Compare.
3 Select a result to compare with.
A GPS location is required before results
can be compared. For more information,
see Using GPS on page 54.
Energy consumption
To calculate and view the energy
consumption for a session you must
first set your personal profile in
Settings in Tracker. You view the
energy consumption in the result view.
To set the personal profile
1 Select Menu > Location services >
Tracker > Settings > Personal profile.
2 Select an item, enter data and select
OK.
3 When finished, select Options > Save
profile.
To turn on energy consumption
• Select Menu > Location services >
Tracker > Settings > Energy
consumption > On.
Synchronising
You can synchronise in two different
ways. You can synchronise your phone
using a computer program or you can
synchronise using an Internet service.
Use only one of the synchronisation
methods at a time with your phone.
For more information, go to
www.sonyericsson.com/support to
read the Synchronisation Feature
guide.
Synchronising using a
computer
You can use a USB cable or Bluetooth
wireless technology to synchronise
phone contacts, appointments,
bookmarks, tasks and notes with a
computer program such as Microsoft
Outlook®.
Before synchronising, you need to
install the Sony Ericsson PC Suite.
Sony Ericsson PC Suite software is
available for download at
www.sonyericsson.com/support.
See Required operating systems on
page 41.
To download Sony Ericsson PC Suite
1 Computer: In your Internet browser, go
to www.sonyericsson.com/support.
2 Select a region and country.
3 Select Software downloads.
4 Select a phone from the list.
5 Select Read more and download under
PC Suite.
6 Select Download now and save the file
to your computer.
Remember where you save the file.
To install Sony Ericsson PC Suite from
the downloaded file
1 Locate the downloaded Sony Ericsson
PC Suite file on the computer.
2 Double-click the file and follow the
instructions.
To synchronise using the
Sony Ericsson PC Suite
1 Computer: Start Sony Ericsson PC
Suite from Start/Programs/
Sony Ericsson/Sony Ericsson PC
Suite.
2 Follow the instructions in the
Sony Ericsson PC Suite for how to
connect.
3 Phone: Select Phone mode.
4 Computer: When you are notified that
the Sony Ericsson PC Suite has found
synchronising.
For usage details, see the
Sony Ericsson PC Suite Help section
once the software has been installed on
your computer.
Synchronising using an
Internet service
You can synchronise with an Internet
service using SyncML™ or a
Microsoft® Exchange Server using
Microsoft Exchange ActiveSync. For
more information, go to
www.sonyericsson.com/support to
read the Synchronisation Feature
guide.
Tell a Friend
Bookmark and Share

w995 sony ericsson : GPS - YouTube - Wi-Fi™ - DLNA - Google Maps™ for mobile - Driving directions - GPS features

Photo feeds

You can subscribe to Photo feeds and

download photos. To start using Photo

feeds, see Web feeds on page 51.

To access photo feeds

Select Menu > Media > Photo > Photo

feeds.

YouTube

You can watch video clips on your

phone by using the YouTube Java

application. You can search for video

clips or upload your own videos.

To access YouTube

Select Menu > Media > Video >

YouTube.

To upload videos to YouTube, you need

to access YouTube and follow the

instructions in the application.

Wi-Fi

Using Wi-Fi you can access the

Internet wirelessly with your phone.

You can browse the Internet at home

(personal networks) or in public access

zones (hot spots):

Personal networks usually

protected. A pass phrase or a key is

required from the owner.

Hot spots usually non-protected

but often requires you to log on to the

operators service before you get

Internet access.

Using Wi-Fi

To be able to browse the Internet using

Wi-Fi you need to search for and

connect to an available network and

then open the Internet browser.

To turn on Wi-Fi

Select Menu > Settings > Connectivity >

Wi-Fi > Turn on.

To connect to a network

1 Select Menu > Settings > Connectivity >

Wi-Fi.

2 Scroll to a network and select

Connect.

To start browsing using Wi-Fi

1 Make sure is showing in the status

bar.

2 Select Menu > Internet.

Often used networks can be saved as

favourites. These will connect

automatically when you are within range

if you turn on Auto connect.

DLNA

Your phone has a built-in DLNA

(Digital Living Network Alliance) server

that connects to the home network

through Wi-Fi. Other DLNA devices

connected to the same home network

can access, view and play images and

music saved in your phone. A

compatible DLNA device can be a

computer, TV or PLAYSTATION®3. For

DLNA to work, Wi-Fi must be turned on

and the phone must be connected to a

favourite network.

To activate DLNA

1 Select Menu > Settings > Connectivity >

Network sharing.

2 Select a favourite network.

3 Select On > Save.

GPS

Your phone has a GPS receiver that

uses satellite signals to calculate your

location.

If you cannot use some GPS features, see

I cannot use Internet-based services on

page 68.

Using GPS

Your location can be found when you

have a clear view of the sky. If your

location is not found after a few

minutes, move to another location. To

help the search, stand still and do not

cover the GPS antenna.

The first time you use the GPS it may take

up to 10 minutes before your location is

found.

Assisted start

With Assisted start your location is

calculated more quickly. If not turned

off, Assisted start will automatically be

used to find your location when

Assisted GPS (A-GPS) technology is

available.

To set when to use Assisted start

1 Select Menu > Location services >

Settings > Assisted start.

2 Select an option.

Google Maps for mobile

Google Maps lets you view your

current location, find other locations

and calculate routes.

When you start Google Maps, your

approximate location is shown using

information from nearby mobile towers.

Your location is updated with a more

precise position when the GPS receiver

finds your location.

To use Google Maps

Select Menu > Location services >

Google Maps.

To learn more about Google Maps

When you use Google Maps, select

Options > Help.

Driving directions

Wayfinder Navigator guides you to

your destination using voice

instructions. A trial version of

Wayfinder Navigator may be included

in the phone.

Sony Ericsson does not warrant the

accuracy of any directional services

including but not limited to turn-by-turn

navigational services.

To start Wayfinder Navigator

Select Menu > Location services >

Navigation.

More GPS features

Save locations

You can find all saved locations in My

favourites.

To save your current location

1 Select Menu > Location services > My

favourites > Add new place.

2 Select Edit and enter the title. Select

OK.

3 Scroll to Description: and select Add.

4 Enter the description and select OK.

5 Scroll to Position: and select Add >

Current position.

6 When the position is found, select

Save.

To view a saved location on a map

1 Select Menu > Location services > My

favourites.

2 Scroll to a location and select Go to.

To access favourites from Google

Maps

Press .

Location requests

External services may ask for your

location.

To change access for external

services

1 Select Menu > Location services >

Settings > Privacy.

2 Select an option.

Turn off GPS

The GPS receiver turns off

automatically when it is not in use. You

can also turn the GPS receiver off

manually. This saves battery power

when you use features that do not

require the GPS receiver to find your

location.

Tell a Friend
Bookmark and Share